

Kedarkantha Trek Complete Guide: Route, Itinerary, Cost, Best Time, Weather & Packing List
The Kedarkantha Trek is one of India’s most popular winter treks, attracting thousands of adventure enthusiasts every year. Nestled in the Garhwal Himalayas of Uttarakhand, this trek offers snow-covered forests, frozen lakes, charming Himalayan villages, and breathtaking panoramic views of peaks like Swargarohini, Bandarpoonch, Black Peak, and Ranglana.
Whether you’re a first-time trekker or an experienced hiker looking for a memorable snow adventure, Kedarkantha provides the perfect blend of natural beauty and moderate challenge. With a summit altitude of approximately 3,810 meters (12,500 feet), it is considered one of the best beginner-friendly Himalayan treks in India.
This Kedarkantha Trek Guide covers everything you need to plan your journey—from the trek route, detailed itinerary, cost, weather, and the best time to visit to fitness preparation, permits, and a complete packing list. By the end of this guide, you’ll have all the information needed to enjoy a safe, comfortable, and unforgettable trekking experience.

Why Choose the Kedarkantha Trek?
Kedarkantha stands out as one of the finest Himalayan treks because it offers stunning scenery throughout the year. During winter, the trail transforms into a magical snow-covered landscape, while spring and autumn showcase lush forests, alpine meadows, and crystal-clear mountain views.
Here are a few reasons why the Kedarkantha Trek is a favorite among trekkers:
-
Perfect for beginners and first-time Himalayan trekkers.
-
Famous for its spectacular winter snowfall and snow-covered trails.
-
Offers breathtaking sunrise and sunset views from the summit.
-
Features dense pine, oak, and rhododendron forests.
-
Passes through picturesque villages like Sankri, where you can experience local Himalayan culture.
-
Can be completed comfortably in 4–6 days, making it ideal for long weekends and short vacations.
If you’re looking for a Himalayan adventure that combines accessibility, scenic beauty, and a rewarding summit experience, the Kedarkantha Trek deserves a place at the top of your travel list.
Kedarkantha Trek Overview & Quick Facts
Planning your first Himalayan trek? The Kedarkantha Trek is an excellent choice. Located inside the Govind Wildlife Sanctuary in Uttarkashi district, Uttarakhand, this trek is famous for its well-defined trails, spectacular snow-covered landscapes, and breathtaking summit views. Every year, thousands of trekkers visit Kedarkantha to experience one of the best winter treks in Uttarakhand and India.
Unlike many high-altitude Himalayan treks, Kedarkantha offers a perfect balance of adventure and accessibility. The trail passes through dense pine and oak forests, frozen lakes, wooden bridges, alpine meadows, and traditional Himalayan villages before reaching the summit at 3,810 meters (12,500 feet).
Whether you’re traveling solo, with friends, or joining an organized trekking group, Kedarkantha promises an unforgettable mountain experience. If you are planning a Kedarkantha Trek Solo, check the route, weather and local guide requirements carefully before starting.
Kedarkantha Trek Quick Facts
| Trek Detail | Information |
|---|---|
| Trek Location | Uttarkashi District, Uttarakhand |
| Base Village | Sankri |
| Summit Altitude | 3,810 m (12,500 ft) |
| Trek Distance | Approximately 20–24 km (round trip) |
| Trek Duration | 5 Days |
| Difficulty Level | Easy to Moderate |
| Best Time | December–April for snow; April–June & September–November for clear mountain views |
| Maximum Altitude Gain | Around 1,900 m from Sankri |
| Starting Point | Sankri Village |
| Nearest Railway Station | Dehradun Railway Station |
| Nearest Airport | Jolly Grant Airport, Dehradun |
| Network Availability | Limited in Sankri; almost none during the trek |
| Camping | Yes |
| Forest Permit | Required |
Where is Kedarkantha Located?
Kedarkantha Peak is situated within the Govind Wildlife Sanctuary and National Park in the Uttarkashi district of Uttarakhand. The trek begins from the beautiful Himalayan village of Sankri, located at an altitude of approximately 1,920 meters (6,400 feet).
Sankri serves as the gateway to several famous Himalayan treks, including Har Ki Dun, Bali Pass, Ruinsara Tal, and Phulara Ridge. Surrounded by dense forests and snow-capped peaks, the village provides an ideal starting point for the Kedarkantha adventure.
The summit rewards trekkers with stunning 360-degree views of iconic Himalayan peaks, including:
-
Swargarohini
-
Bandarpoonch
-
Black Peak (Kala Nag)
-
Ranglana
-
Gangotri Range
-
Yamunotri Range
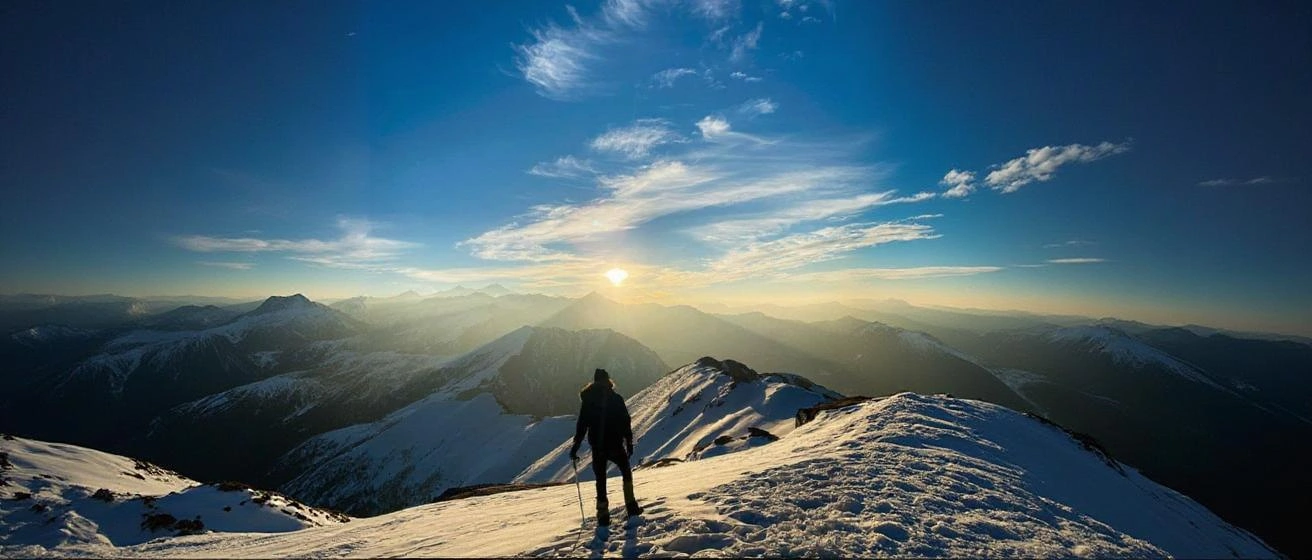
On clear winter mornings, the sunrise from the Kedarkantha summit creates a golden glow across the Himalayan landscape, making it one of the trek’s biggest highlights.
Why is Kedarkantha So Popular?
The popularity of the Kedarkantha Trek continues to grow because it offers everything a trekker could ask for in a short Himalayan expedition.
Some of the reasons include:
-
Beginner-friendly trail with gradual ascents.
-
Reliable snowfall during winter.
-
Dense pine, cedar, and oak forests.
-
Beautiful campsites like Juda Ka Talab and Kedarkantha Base Camp.
-
Spectacular summit views with minimal technical climbing.
-
Easily accessible from Dehradun.
-
Suitable for families, students, solo travelers, and adventure groups.
These features make Kedarkantha one of the most recommended winter treks in India, especially for those planning their first high-altitude trekking experience.
Kedarkantha Trek Itinerary – Route & Detailed Day-by-Day Plan
One of the biggest reasons behind the popularity of the Kedarkantha Trek is its well-planned route. The trail offers a gradual ascent through dense forests, beautiful clearings, frozen lakes, and scenic campsites before culminating at the summit. Most trekking operators complete the trek in 5 days, while the actual trekking distance is around 20 km.
Below is the standard itinerary followed by most guided expeditions.
Kedarkantha Trek Route
Dehradun → Sankri → Juda Ka Talab → Kedarkantha Base Camp → Kedarkantha Summit → Hargaon → Sankri → Dehradun
Route Highlights
-
Drive through the picturesque Tons River Valley.
-
Stay in the charming Himalayan village of Sankri.
-
Trek through dense pine, oak, and maple forests.
-
Camp beside the beautiful Juda Ka Talab.
-
Witness breathtaking sunrise views from the Kedarkantha Summit.
-
Descend through the scenic Hargaon campsite.
Day 1: Dehradun to Sankri
-
Distance: Approximately 200 km
-
Travel Time: 8–10 hours
-
Altitude: 1,920 m (6,400 ft)
Your journey begins in Dehradun, from where you’ll drive to the remote mountain village of Sankri. The route passes through Mussoorie, Naugaon, Purola, Mori, and Netwar, offering spectacular views of rivers, forests, and traditional Himalayan villages.
As you approach Sankri, the air becomes cooler, and the snow-covered Himalayan peaks begin to appear in the distance. After checking into your guesthouse or homestay, you’ll meet your trek leader, attend a briefing session, and prepare your gear for the adventure ahead.
Highlights
-
Scenic drive through the Garhwal Himalayas.
-
Tons River Valley views.
-
Overnight stay in Sankri.
Day 2: Sankri to Juda Ka Talab
-
Distance: 4–5 km
-
Duration: 4–5 hours
-
Altitude: 2,700 m (8,860 ft)
The trek officially begins from Sankri. The trail gradually climbs through dense forests of pine, oak, maple, and cedar. During winter, these forests are blanketed in snow, making the Kedarkantha Trek in Winter a memorable experience.
After several hours of trekking, you’ll arrive at Juda Ka Talab, a picturesque alpine lake surrounded by towering trees. In winter, the lake often freezes, adding to its charm.
Spend the evening enjoying the peaceful surroundings before settling into your campsite.
Highlights
-
Snow-covered forest trails (winter season).
-
Frozen Juda Ka Talab.
-
First night of Kedarkantha Trek Camping.
Day 3: Juda Ka Talab to Kedarkantha Base Camp
-
Distance: 4 km
-
Duration: 3–4 hours
-
Altitude: 3,400 m (11,150 ft)
Today’s trek is relatively short but steeper than the previous day. As you gain altitude, the forests gradually open into expansive meadows, offering panoramic views of the surrounding Himalayan peaks.
The Kedarkantha Base Camp is one of the most scenic campsites in Uttarakhand. Surrounded by snow-covered mountains, it provides an ideal location to rest before the summit climb.
Trekkers usually retire early because the summit push starts before dawn.
Highlights
-
Panoramic mountain views.
-
Beautiful alpine meadows.
-
Sunset over the Himalayas.
-
Overnight stay at Base Camp.
Day 4: Kedarkantha Summit & Descend to Hargaon
-
Distance: 6–7 km
-
Duration: 7–8 hours
-
Summit Altitude: 3,810 m (12,500 ft)
The most exciting day of the trek begins around 2:00–3:00 AM. Equipped with headlamps, trekkers gradually climb toward the summit under a star-filled sky.
Reaching the summit at sunrise is an unforgettable experience. On a clear day, you’ll enjoy panoramic views of:
-
Swargarohini
-
Bandarpoonch
-
Black Peak (Kala Nag)
-
Ranglana
-
Gangotri Range
-
Yamunotri Range
After spending some time at the summit, you’ll descend to the Hargaon campsite, following a different route that offers fresh scenery and peaceful forest trails.
Highlights
-
Sunrise from Kedarkantha Summit.
-
360-degree Himalayan views.
-
Summit temple and prayer flags.
-
Scenic descent to Hargaon.
Day 5: Hargaon to Sankri & Return to Dehradun
Distance: 4 km Trek + Approximately 200 km Drive
Duration: 11–14 hours
-
The final day begins with an easy descent from Hargaon to Sankri through beautiful pine forests and mountain trails. After reaching Sankri, you’ll have some time to relax, explore the traditional Himalayan village, interact with locals, and celebrate the successful completion of your trek.
-
After breakfast and a short break in Sankri, you’ll begin the return drive to Dehradun. The scenic mountain roads will take you through the breathtaking Himalayan landscapes as you gradually leave the mountains behind. Carrying unforgettable memories of snow-covered trails, spectacular summit views, and the warm hospitality of Himalayan villages, you’ll reach Dehradun by evening.
-
Highlights
• Leisurely forest descent.
• Traditional Himalayan village experience.
• Trek completion celebration.
• Scenic drive back to Dehradun.
Updated Trek Distance Summary
| Day | Route | Distance |
|---|---|---|
| Day 1 | Dehradun → Sankri | 200 km (Drive) |
| Day 2 | Sankri → Juda Ka Talab | 4–5 km |
| Day 3 | Juda Ka Talab → Base Camp | 4 km |
| Day 4 | Base Camp → Summit → Hargaon | 6–7 km |
| Day 5 | Hargaon → Sankri → Dehradun | 4–5 km Trek + 200 km Drive |

Kedarkantha Trek Difficulty, Altitude & Fitness Guide
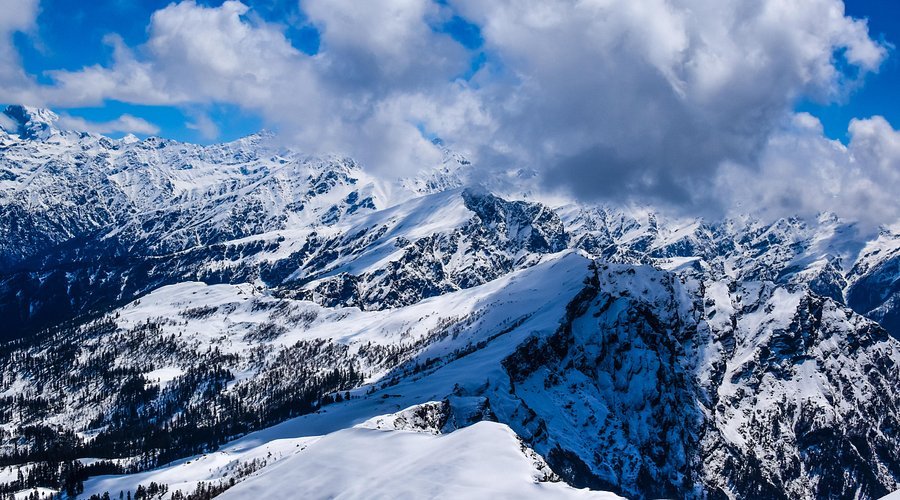
One of the most common questions among trekkers is, “Is the Kedarkantha Trek difficult?” The good news is that Kedarkantha is considered one of the best beginner-friendly Himalayan treks in India. While the trail includes a few steep sections and snow-covered paths during winter, it does not require any technical climbing or prior mountaineering experience.
With proper preparation, basic fitness, and the right gear, most healthy individuals can complete the trek comfortably.
Kedarkantha Trek Difficulty Level
Difficulty Rating: Easy to Moderate ⭐⭐⭐☆☆
The trek is suitable for:
-
First-time trekkers
-
Solo travelers
-
College students
-
Families with older children (generally above 10–12 years)
-
Adventure enthusiasts with basic fitness
Unlike high-altitude expeditions that involve glacier crossings or technical sections, the Kedarkantha trail is well-defined and gradually gains elevation over several days. Experienced trek leaders and local guides further make the journey safe and enjoyable.
However, winter snowfall can make certain sections slippery, so proper trekking shoes and careful footing are essential.
Kedarkantha Trek Altitude
The highest point of the trek is the Kedarkantha Summit, located at:
-
Altitude: 3,810 meters (12,500 feet)
Altitude Breakdown
| Location | Altitude |
|---|---|
| Dehradun | 640 m |
| Sankri | 1,920 m |
| Juda Ka Talab | 2,700 m |
| Kedarkantha Base Camp | 3,400 m |
| Kedarkantha Summit | 3,810 m |
Although the altitude is moderate compared to many Himalayan treks, your body still needs time to adjust to the thinner air. The gradual ascent from Sankri helps reduce the risk of altitude-related problems.
Kedarkantha Trek for Beginners – Can Beginners Do It?
Yes. Kedarkantha is widely regarded as one of the best treks for beginners because it offers:
-
Well-marked trails.
-
Moderate daily trekking distances.
-
Comfortable campsites.
-
Professional guides and support staff.
-
Beautiful summit views without technical climbing.
Many people complete Kedarkantha as their very first Himalayan trek. Even if you have never trekked before, consistent fitness preparation and the right mindset can make the experience enjoyable.
Fitness Requirements
While technical skills are not required, a good fitness level will make the trek more comfortable and reduce fatigue.
Aim to prepare for 4–6 weeks before your trek.
Cardio Training
Improve your stamina with activities such as:
-
Running
-
Brisk walking
-
Cycling
-
Swimming
-
Stair climbing
Try to jog or walk 4–5 km continuously without excessive exhaustion.
Strength Training
Strong legs and core muscles help on uphill climbs and descents. Include exercises like:
-
Squats
-
Lunges
-
Step-ups
-
Planks
-
Push-ups
-
Mountain climbers
Perform strength workouts 3–4 times a week.
Flexibility & Balance
Stretching helps prevent injuries and improves mobility.
Focus on:
-
Hamstrings
-
Calves
-
Hip flexors
-
Lower back
-
Shoulders
Simple yoga poses and balance exercises can also improve stability on uneven trails.
Acclimatization Tips
Although Kedarkantha’s altitude is manageable, proper acclimatization is still important.
Follow these tips:
-
Walk at a steady pace instead of rushing.
-
Stay well hydrated throughout the trek.
-
Eat nutritious meals and snacks.
-
Avoid alcohol and smoking before and during the trek.
-
Get enough sleep each night.
-
Inform your trek leader immediately if you experience unusual symptoms.
Most trekkers adjust well because the itinerary allows for gradual altitude gain.
Symptoms of Altitude Sickness
Some trekkers may experience mild symptoms due to the reduced oxygen levels at higher elevations.
Watch for:
-
Headache
-
Dizziness
-
Nausea
-
Loss of appetite
-
Fatigue
-
Difficulty sleeping
If symptoms become severe or worsen, descend to a lower altitude and seek assistance from your trek leader or medical support.
Safety Tips for a Successful Trek
-
Wear waterproof trekking shoes with good grip.
-
Dress in layers to adapt to changing temperatures.
-
Carry a reusable water bottle and stay hydrated.
-
Use trekking poles for added balance, especially on snowy sections.
-
Apply sunscreen and wear UV-protective sunglasses.
-
Follow your guide’s instructions at all times.
-
Respect nature by carrying back all non-biodegradable waste.
Who Should Avoid the Trek?
The Kedarkantha Trek may not be suitable for:
-
People with severe heart or lung conditions.
-
Individuals recovering from major surgery.
-
Those with uncontrolled high blood pressure.
-
Anyone who is unwell at the time of the trek.
If you have a pre-existing medical condition, consult your doctor before planning a high-altitude trek.
Best Time to Visit Kedarkantha Trek & Month-by-Month Weather Guide
One of the biggest advantages of the Kedarkantha Trek is that it can be enjoyed during most months of the year. However, the experience changes significantly with each season. While winter transforms the trail into a snowy wonderland, spring brings blooming rhododendrons, and autumn offers crystal-clear mountain views.
If you’re wondering “What is the best time to do the Kedarkantha Trek?”, the answer depends on the kind of experience you’re looking for.
Kedarkantha Trek Best Time to Visit
Kedarkantha Trek in Winter (December to February) – Best for Snow Lovers ⭐⭐⭐⭐⭐
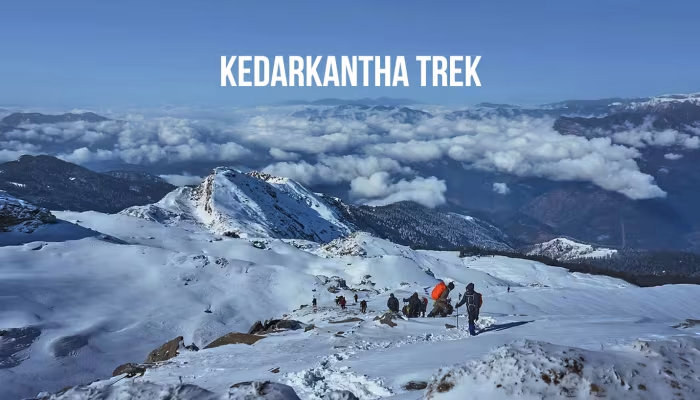
Winter is the most popular season for the Kedarkantha Trek. Fresh snowfall blankets the forests, meadows, and campsites, creating a magical Himalayan landscape. The summit offers spectacular sunrise views over snow-covered peaks, making this the ideal time for photography and first-time snow trekkers. The trail also gives plenty of opportunities to capture Kedarkantha Trek Photos of snowy forests, campsites and Himalayan peaks.
Temperature
-
Day: 5°C to 10°C
-
Night: -10°C to -2°C
Why Visit in Winter?
-
Thick snow-covered trails
-
Frozen Juda Ka Talab
-
Stunning white landscapes
-
Ideal for winter trekking enthusiasts
-
Peak trekking season with vibrant campsites
Things to Keep in Mind
-
Extremely cold nights
-
Proper winter clothing is essential
-
Snowfall may occasionally delay travel
Spring (March to April) – Best for Pleasant Weather ⭐⭐⭐⭐☆
As winter gradually fades, the snow begins to melt, revealing lush meadows and vibrant forests. Rhododendron flowers bloom along the trail, adding bursts of red and pink to the landscape.
Spring offers a perfect balance of cool weather and scenic beauty, making it a great choice for beginners who want to avoid extreme winter conditions.
Temperature
-
Day: 10°C to 15°C
-
Night: 0°C to 5°C
Highlights
-
Comfortable trekking weather
-
Blooming rhododendron forests
-
Clear mountain views
-
Less extreme cold
Summer (May to June) – Best for Green Landscapes ⭐⭐⭐☆☆
Although Kedarkantha is mainly known as a winter trek, summer has its own charm. The forests are lush and green, wildlife is more active, and the weather remains pleasant compared to the plains.
Snow is usually limited to higher elevations, but the clear skies provide excellent views of the surrounding Himalayan peaks.
Temperature
-
Day: 15°C to 20°C
-
Night: 5°C to 10°C
Highlights
-
Comfortable temperatures
-
Green forests and alpine meadows
-
Ideal for nature lovers
-
Excellent visibility for photography
Monsoon (July to August) – Not Recommended ⭐⭐☆☆☆
The monsoon season brings heavy rainfall to the region, making the trails slippery and increasing the risk of landslides on the road to Sankri. Cloud cover often blocks mountain views, and trekking becomes more challenging.
Most trekking operators avoid organizing regular batches during this period.
Temperature
-
Day: 15°C to 20°C
-
Night: 10°C to 15°C
Challenges
-
Heavy rainfall
-
Slippery trails
-
Leeches in forest sections
-
Poor visibility
-
Possible road closures
Autumn (September to November) – Best for Mountain Views ⭐⭐⭐⭐⭐
Autumn is one of the most underrated seasons for the Kedarkantha Trek. The skies are exceptionally clear after the monsoon, offering breathtaking views of the Himalayan ranges. The forests are fresh, and the weather is cool yet comfortable.
By late November, the first snowfall often begins at higher elevations, giving trekkers a chance to experience early winter conditions.
Temperature
-
Day: 8°C to 15°C
-
Night: -2°C to 5°C
Highlights
-
Crystal-clear mountain views
-
Pleasant trekking conditions
-
Less crowded trails
-
Early snowfall in late November
Kedarkantha Weather by Month
| Month | Weather | Snow | Recommendation |
|---|---|---|---|
| January | Very Cold | Heavy | ⭐⭐⭐⭐⭐ Best for snow |
| February | Very Cold | Heavy | ⭐⭐⭐⭐⭐ Excellent |
| March | Cool | Moderate | ⭐⭐⭐⭐ Great |
| April | Pleasant | Light at higher altitudes | ⭐⭐⭐⭐ Very Good |
| May | Mild | Minimal | ⭐⭐⭐ Good |
| June | Warm | Rare | ⭐⭐⭐ Good |
| July | Rainy | No | ⭐ Not Recommended |
| August | Rainy | No | ⭐ Not Recommended |
| September | Cool | No | ⭐⭐⭐⭐ Excellent |
| October | Cool & Clear | No | ⭐⭐⭐⭐⭐ Excellent |
| November | Cold | Light snowfall possible | ⭐⭐⭐⭐⭐ Excellent |
| December | Very Cold | Heavy | ⭐⭐⭐⭐⭐ Peak Season |
Which Month is Best for Snowfall?
If your dream is to walk through fresh snow and camp in a winter wonderland, plan your trek during:
-
Late December
-
January
-
February
-
Early March (depending on snowfall)
These months typically offer the best snow conditions, making them the most popular time for the Kedarkantha Trek. For travelers planning a Kedarkantha Trek in December or Kedarkantha Trek in January, winter gear and an early booking are especially important.
Best Time Based on Your Travel Style
Choose December to February if you want:
-
Fresh snowfall
-
Snow-covered forests
-
Frozen lakes
-
Winter camping
-
A classic Himalayan snow trek
Choose March to April if you want:
-
Pleasant weather
-
Blooming rhododendrons
-
Some remaining snow
-
Comfortable trekking conditions
Choose September to November if you want:
-
Clear Himalayan views
-
Fewer crowds
-
Crisp weather
-
Excellent photography opportunities
Seasonal Packing Tips
Your packing list should match the season of your trek:
Winter (December–February)
-
Heavy insulated jacket
-
Thermal base layers
-
Waterproof gloves
-
Woollen cap and neck gaiter
-
Snow gaiters (optional)
-
Extra wool socks
Spring & Autumn
-
Fleece jacket
-
Light down jacket
-
Warm cap
-
Lightweight gloves
-
Windproof outer layer
Summer
-
Breathable trekking clothes
-
Sun hat
-
Sunglasses
-
Light fleece for evenings
-
Rain jacket for unexpected showers
Kedarkantha Trek Cost – Package Price, Budget Breakdown & Inclusions
One of the most frequently asked questions by trekkers is, “How much does the Kedarkantha Trek cost?” The total cost depends on whether you choose a guided trekking package or plan the trip independently. Factors such as transportation, accommodation, trek duration, season, and included services also affect the overall budget.
For most travelers, joining a guided trek is the safest and most convenient option. Trek operators handle permits, accommodation, meals, camping equipment, and experienced guides, allowing you to focus on enjoying the journey.
Kedarkantha Trek Package Cost
The average cost of a 5-day or 6-day Kedarkantha Trek package generally falls within the following range:
| Package Type | Approximate Cost (Per Person) |
|---|---|
| Budget Group Trek | ₹5,999 – ₹7,999 |
| Standard Trek Package | ₹7,999 – ₹10,999 |
| Premium Trek Package | ₹10,999 – ₹14,999 |
Note: Prices may vary depending on the trekking company, travel season, group size, and services included.
What is Included in a Trek Package?
Most reputed trekking operators include the following services:
-
Accommodation in Sankri (guesthouse or homestay)
-
Camping accommodation during the trek
-
All meals during the trek (breakfast, lunch, snacks, dinner)
-
Experienced trek leader and local guides
-
Forest permits and camping fees
-
Qualified support staff
-
Sleeping bags, sleeping mats, and tents
-
Basic first-aid kit
-
Safety equipment
-
Cloakroom facility for extra luggage
These inclusions help ensure a comfortable and well-organized trekking experience.
What is Usually Not Included?
Before booking your trek, carefully check what the package excludes. Common exclusions include:
-
Travel between your home city and Dehradun
-
Transportation from Dehradun to Sankri (unless specified)
-
Personal trekking gear and clothing
-
Backpack and trekking shoes
-
Travel insurance
-
Personal expenses
-
Hot water, charging facilities, and Wi-Fi
-
Emergency evacuation costs
-
Tips for guides and support staff
Always read the package details carefully to avoid unexpected expenses.
DIY Kedarkantha Trek Budget
If you prefer planning the trek on your own, here is an estimated budget:
| Expense | Approximate Cost |
|---|---|
| Dehradun to Sankri Transport | ₹800–₹2,500 |
| Guesthouse in Sankri | ₹800–₹2,000 per night |
| Meals | ₹500–₹1,000 per day |
| Camping Equipment Rental | ₹1,500–₹4,000 |
| Forest Permit | Varies by local regulations |
| Guide Charges | ₹2,000–₹5,000 per group |
| Miscellaneous Expenses | ₹1,000–₹2,000 |
Estimated Total DIY Budget: ₹8,000–₹15,000 per person, depending on your travel style and group size.
For first-time trekkers, a guided package is often more economical and convenient once equipment rentals and logistics are taken into account.
Additional Expenses to Consider
When planning your budget, don’t forget these optional costs:
Travel to Dehradun
-
Flight (varies by departure city)
-
Train tickets
-
Bus fares
Trekking Gear Rental
If you don’t own trekking equipment, you can rent:
-
Trekking shoes
-
Trekking poles
-
Down jacket
-
Rucksack
-
Gaiters
-
Microspikes (during heavy snowfall)
Renting gear can significantly reduce costs compared to buying new equipment.
Is the Kedarkantha Trek Worth the Cost?
Absolutely. Considering the experience, the Kedarkantha Trek offers excellent value for money. A typical package includes accommodation, meals, camping gear, permits, guides, and safety support—all while taking you through some of the most scenic Himalayan landscapes.
Compared to many other Himalayan treks, Kedarkantha remains an affordable option for beginners and experienced trekkers alike.
Money-Saving Tips
You can reduce your overall trip cost by following these tips:
-
Book your trek well in advance, especially for the winter season.
-
Travel in a group to share transportation costs.
-
Carry your own trekking gear if possible.
-
Choose weekday departures during peak months for better availability.
-
Compare package inclusions instead of selecting the cheapest option.
-
Book directly with a reputed trekking company to avoid unnecessary commissions.
Choosing the Right Trek Operator
While price is important, it shouldn’t be the only deciding factor. Before booking, consider:
-
Certified and experienced trek leaders
-
Safety protocols and emergency support
-
Quality of camping equipment
-
Group size
-
Customer reviews
-
Transparent pricing
-
Meals and accommodation quality
-
Medical and first-aid arrangements
A reliable trek operator enhances both your safety and overall experience.
Estimated Total Budget
Here’s a rough estimate for the complete trip, including travel to Dehradun:
| Travel Style | Estimated Budget |
|---|---|
| Budget Traveler | ₹8,000–₹12,000 |
| Mid-Range Traveler | ₹12,000–₹18,000 |
| Premium Traveler | ₹18,000–₹25,000+ |
The final amount depends on your starting location, travel preferences, and whether you choose a guided package or a self-planned trek.
How to Reach Kedarkantha Trek (Sankri) – Complete Travel Guide
The Kedarkantha Trek starts from Sankri, a beautiful Himalayan village located in Uttarkashi district, Uttarakhand. Situated at an altitude of around 1,920 meters, Sankri is the base village for popular treks like Har Ki Dun, Bali Pass, Phulara Ridge, and Kedarkantha.
Most trekkers first reach Dehradun, which is the main gateway to Sankri, and then continue their journey by road.
Kedarkantha Trek Location
-
Base Village: Sankri
-
District: Uttarkashi, Uttarakhand
-
Nearest City: Dehradun
-
Distance from Dehradun: 190–200 km
-
Travel Time: 8–10 hours by road
Step 1: Reach Dehradun
Dehradun is well connected by air, train, and bus.
By Flight
The nearest airport is Jolly Grant Airport, Dehradun.
Flights are available from major cities like:
-
Delhi
-
Mumbai
-
Bengaluru
-
Hyderabad
-
Jaipur
-
Lucknow
From the airport, you can take a taxi to Dehradun city.
By Train
The nearest railway station is Dehradun Railway Station.
Popular trains include:
-
Dehradun Shatabdi Express
-
Nanda Devi Express
-
Mussoorie Express
An overnight train from Delhi is a convenient option for trekkers.
By Bus
Regular buses connect Dehradun with:
-
Delhi
-
Chandigarh
-
Haridwar
-
Rishikesh
-
Jaipur
Step 2: Dehradun to Sankri
The drive from Dehradun to Sankri is one of the most scenic parts of the journey.
Distance: 190–200 km
Duration: 8–10 hours
Transport Options
Shared Taxi
-
Budget-friendly option
-
Approx. ₹700–₹1,200 per person
Private Taxi
-
Best for groups and families
-
Approx. ₹6,000–₹8,500 per vehicle
Trek Operator Transport
-
Convenient option for first-time trekkers
-
Usually includes pickup and drop services
Dehradun to Sankri Route
The common route is:
Dehradun → Mussoorie → Naugaon → Purola → Mori → Netwar → Sankri
During the journey, you can enjoy:
-
Pine forests
-
Tons River views
-
Garhwali villages
-
Mountain landscapes
-
Scenic viewpoints
How to Reach Kedarkantha from Major Cities
Delhi to Kedarkantha
-
Delhi → Dehradun (train/flight/bus)
-
Dehradun → Sankri (taxi)
-
Total time: Around 12–16 hours
Mumbai to Kedarkantha
-
Flight to Dehradun
-
Road journey to Sankri
-
Total time: Around 12–14 hours
Bengaluru to Kedarkantha
-
Flight to Dehradun (direct or via Delhi)
-
Taxi to Sankri
-
Total time: Around 13–15 hours
Road Conditions & Travel Tips
The road to Sankri is mostly good, but mountain routes require caution.
Keep in mind:
-
Roads become winding after Mussoorie.
-
Winter snowfall can cause delays.
-
Monsoon may bring landslide-related disruptions.
-
Start early to reach Sankri before sunset.
Mobile Network on Kedarkantha Route
Network connectivity becomes limited after Sankri.
-
BSNL generally works best in the region.
-
Jio and Airtel may work in parts of Sankri.
-
No network is usually available during the trek.
Download offline maps and save important contacts before starting.
Sample Travel Plan
Day 0
-
Reach Dehradun
-
Stay overnight
-
Arrange last-minute trekking essentials
Day 1
-
Drive to Sankri
-
Check into accommodation
-
Attend trek briefing
Planning your journey properly ensures a smooth beginning to your Kedarkantha Trek and lets you enjoy the stunning beauty of the Garhwal Himalayas.
Kedarkantha Trek Packing List – Complete Checklist
Packing the right gear is essential for a comfortable and safe Kedarkantha Trek experience. A practical Kedarkantha Trek Guide should always include a clear packing checklist, especially for winter departures. Himalayan weather can change quickly, especially during winter when temperatures drop below freezing. The goal is to pack smart and keep your backpack lightweight.
Clothing Essentials
Carry proper layers to stay warm and comfortable:
-
2–3 quick-dry T-shirts
-
Thermal innerwear (especially for winter)
-
Fleece jacket
-
Down jacket (essential for snow treks)
-
Waterproof and windproof jacket
-
2 trekking pants
-
Woollen cap and gloves
-
Neck gaiter/buff
-
2–3 pairs of woollen trekking socks
Footwear
Good trekking shoes are extremely important.
Carry:
-
Waterproof trekking shoes with good grip
-
Extra trekking socks
-
Camp shoes/slippers (optional)
Backpack Essentials
-
50–60 litre backpack with rain cover
-
Water bottle (1–2 litres)
-
Headlamp with extra batteries
-
Power bank
-
UV-protection sunglasses
-
Sunscreen (SPF 50+)
-
Lip balm
-
Personal toiletries
-
Dry bags or zip-lock bags
Medical Kit
Carry basic medicines and first-aid items:
-
Personal medicines
-
Pain relievers
-
ORS/electrolytes
-
Band-aids
-
Antiseptic cream
-
Blister patches
-
Allergy medicines
Energy Snacks
Keep quick energy sources for the trail:
-
Dry fruits
-
Energy bars
-
Chocolates
-
Glucose/electrolyte sachets
Winter Trek Special Gear
For December to February treks, add:
-
Heavy warm jacket
-
Thermal gloves
-
Extra woollen socks
-
Snow gaiters (optional)
-
Trekking poles
Avoid Carrying
Avoid unnecessary weight:
-
Jeans
-
Heavy luggage
-
Excess clothes
-
Expensive items
-
Unnecessary gadgets
Quick Packing Checklist
✔ Trekking shoes
✔ Warm layers
✔ Backpack with rain cover
✔ Water bottle
✔ Headlamp
✔ Sunglasses
✔ Sunscreen
✔ Personal medicines
✔ Power bank
✔ Energy snacks
Packing Tip
Try to keep your backpack weight around 8–10 kg. A lighter backpack makes uphill climbs easier and helps you enjoy the trek comfortably.
With the right preparation and essential gear, the Kedarkantha Trek becomes a safe, comfortable, and unforgettable Himalayan adventure.
Kedarkantha Trek Safety Tips, Permits & Important Guidelines
The Kedarkantha Trek is beginner-friendly, but trekking in the Himalayas requires proper preparation and awareness. Following basic safety guidelines helps you enjoy a safe and memorable adventure.
Kedarkantha Trek Safety Tips
-
Walk at a comfortable pace and avoid rushing on steep sections.
-
Stay hydrated and drink enough water throughout the trek.
-
Follow your trek leader’s instructions.
-
Wear proper trekking shoes with good grip.
-
Dress in layers to handle changing weather conditions.
-
Avoid littering and respect the Himalayan environment.
-
Inform your trek team immediately if you feel unwell.
Altitude & Health Precautions
Although Kedarkantha is a moderate-altitude trek, some trekkers may experience:
-
Headache
-
Fatigue
-
Dizziness
-
Nausea
-
Shortness of breath
To stay comfortable:
-
Take proper rest.
-
Keep yourself hydrated.
-
Eat nutritious meals.
-
Avoid alcohol and smoking before and during the trek.
Permits Required for Kedarkantha Trek
Since Kedarkantha falls under the Govind Wildlife Sanctuary, trekkers may require:
-
Forest entry permit
-
Identification proof
-
Trek registration (depending on current local rules)
Most trekking operators arrange the required permits on behalf of trekkers. Before booking, read a recent Kedarkantha Trek Review and check what is included in your package.
Responsible Trekking Guidelines
Help protect the Himalayas by following responsible trekking practices:
-
Carry reusable water bottles.
-
Avoid single-use plastics.
-
Bring back all non-biodegradable waste.
-
Do not disturb wildlife.
-
Respect local culture and villages.
-
Keep campsites clean.
Emergency & Safety Preparation
Before starting the trek:
-
Carry a basic first-aid kit.
-
Save emergency contact numbers.
-
Keep a power bank for communication.
-
Inform family or friends about your itinerary.
-
Purchase travel insurance for extra safety.
Kedarkantha Trek FAQs
Q1. Is Kedarkantha Trek suitable for beginners?
Yes, Kedarkantha is one of the best beginner-friendly Himalayan treks with a moderate difficulty level.
Q2. What is the Kedarkantha Trek Best Time to Visit?
December to February is the best time for snowfall, while March–April and October–November offer pleasant weather and clear views.
Q3. How long is the Kedarkantha Trek?
The trek usually takes 4–6 days and covers around 20–24 km.
Q4. What is the Kedarkantha Trek altitude?
The summit altitude is approximately 3,810 meters (12,500 feet).
Q5. Do I need a guide for Kedarkantha Trek?
A guide is recommended, especially for first-time trekkers and winter snow conditions.
Q6. What is the Kedarkantha Trek Cost?
A typical trek package costs around ₹6,000–₹15,000 per person, depending on inclusions and season.
Q7. Is snowfall guaranteed on Kedarkantha Trek?
Snowfall is most likely from December to February, but conditions depend on yearly weather patterns.
Q8. What should I pack for Kedarkantha Trek?
Carry warm layers, trekking shoes, thermal wear, a waterproof jacket, gloves, sunscreen, medicines, and essential trekking gear.